Using the Offset filter in Photoshop to create patterns
As I promised in last week’s post I wanted to share what I’ve learnt so far about making patterns in Photoshop. I am definitely not an expert and I still have much to learn, but these tricks might help you start out with your own basic patterns. Making patterns in Photoshop is fun and it’s quite addictive. But above all it’s very easy if you use the Offset filter (I use Photoshop CC2015 on a PC). The print screen images are clickable for larger view.
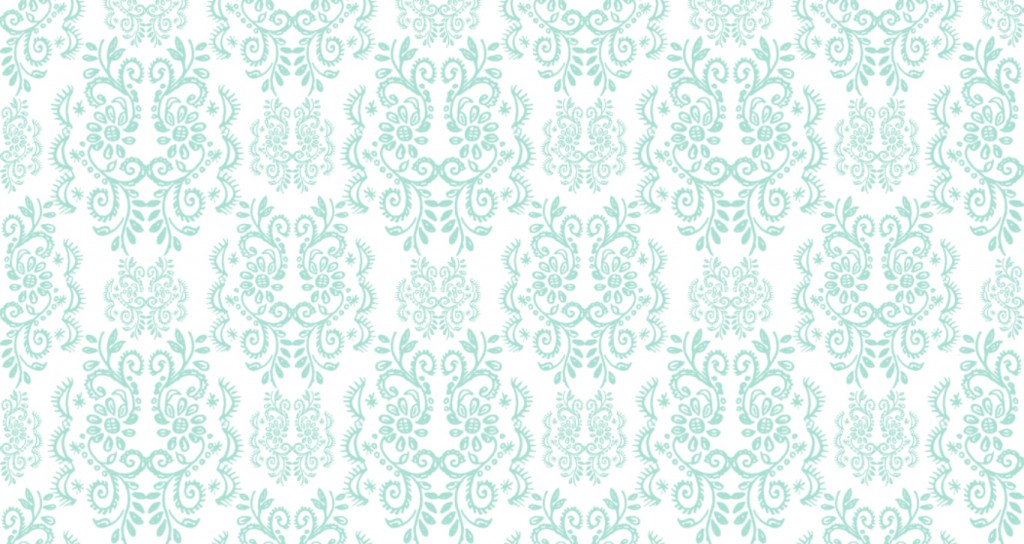
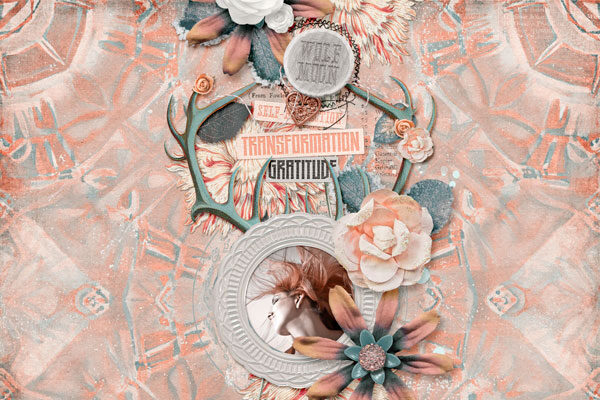
This is one of the patterns I made for ZENZIJN and Petra used it here .
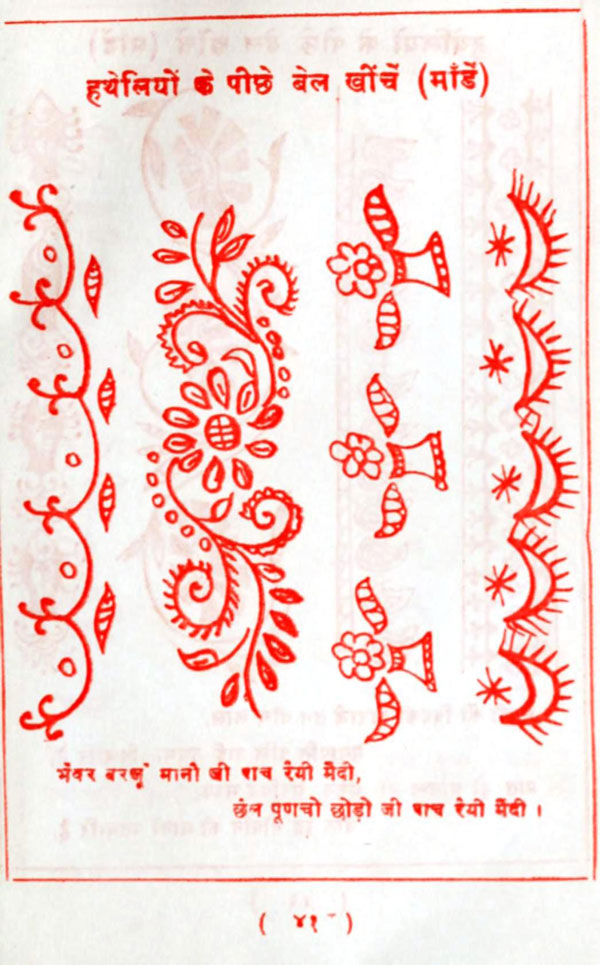
You can make the most amazing patterns from simple ornamental elements. For this particular pattern I used an image from Vintage Printable, a site that is jam-packed with vintage public domain images:
In order to use the drawings for a pattern I needed to somehow extract them from the background. As you can see it is not that easy to cut this out in Photoshop, even with the pen tool. My trick? Turn the items into a brush, then save them as png files.
Bittbox has a tutorial on how to prepare images to create sharp and clean Photoshop brushes. It’s from 2007, but it’s still working perfectly. You can find it here. First I turned the image black and white, then I selected some of the elements that I wanted to use in the pattern (with the Lasso tool), then I followed the steps in the Bittbox tutorial. Once you have your brushes, you can save them as separate png files for use in a pattern. Simply open up a new Photoshop document, apply your brush and save as png.
I ended up with these two elements:
With these elements we are going to create a tile for our pattern. The tile will then be repeated in the final pattern.
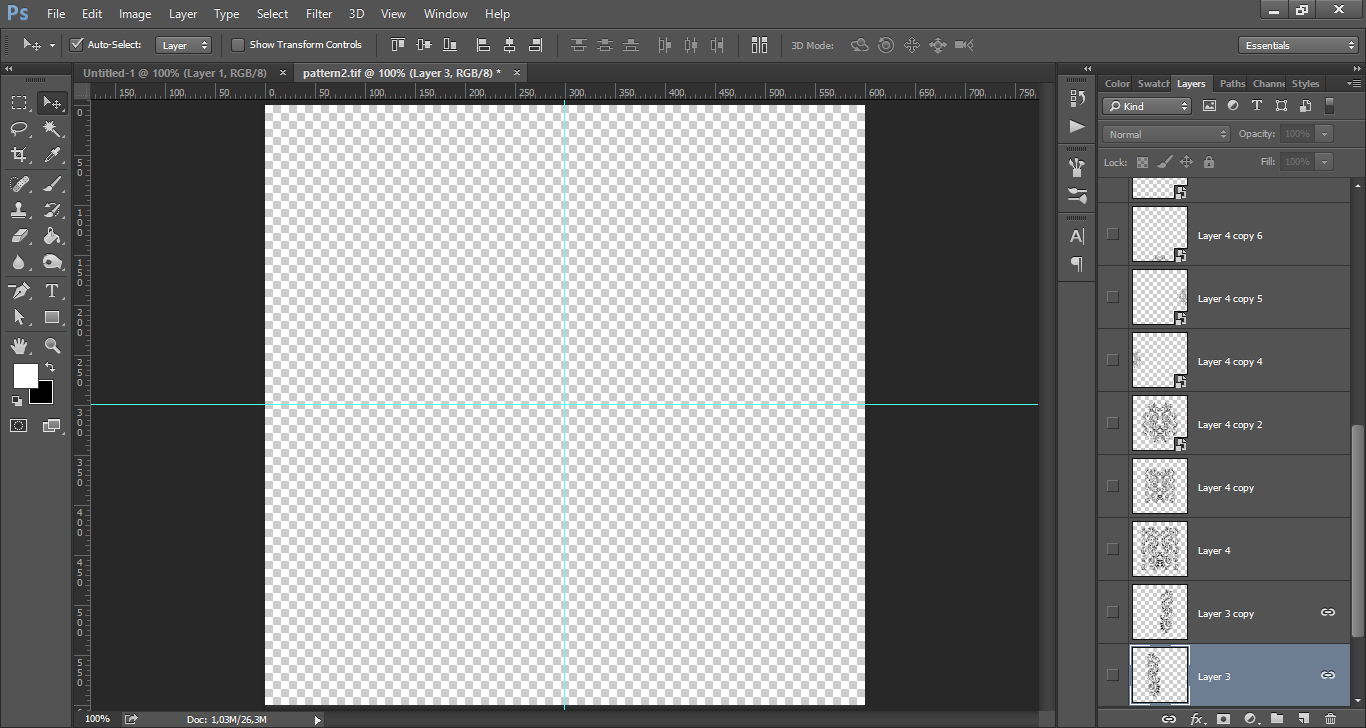
Create a new Photoshop document, size 600 x 600 px, at 300 dpi. If you are going to use the Offset filter it is important to choose dimensions that can easily be divided into 2, 3, 4, 5 and so on. You’ll understand why further in this tutorial.
Set guides at half the width and height to help you center the pattern. A very easy way to do so is to choose Window > New guide, then select Horizontal or Vertical and set the position at 50 %; Photoshop will automatically put the guides at 300 px horizontally and 300 px vertically. You could also have set the position at 300 px right away, in this case it was easy to calculate. But in other documents where you want a guide at half the width or height, it might not be that easy and then you can just add 50 % (or any other percentage that is needed).
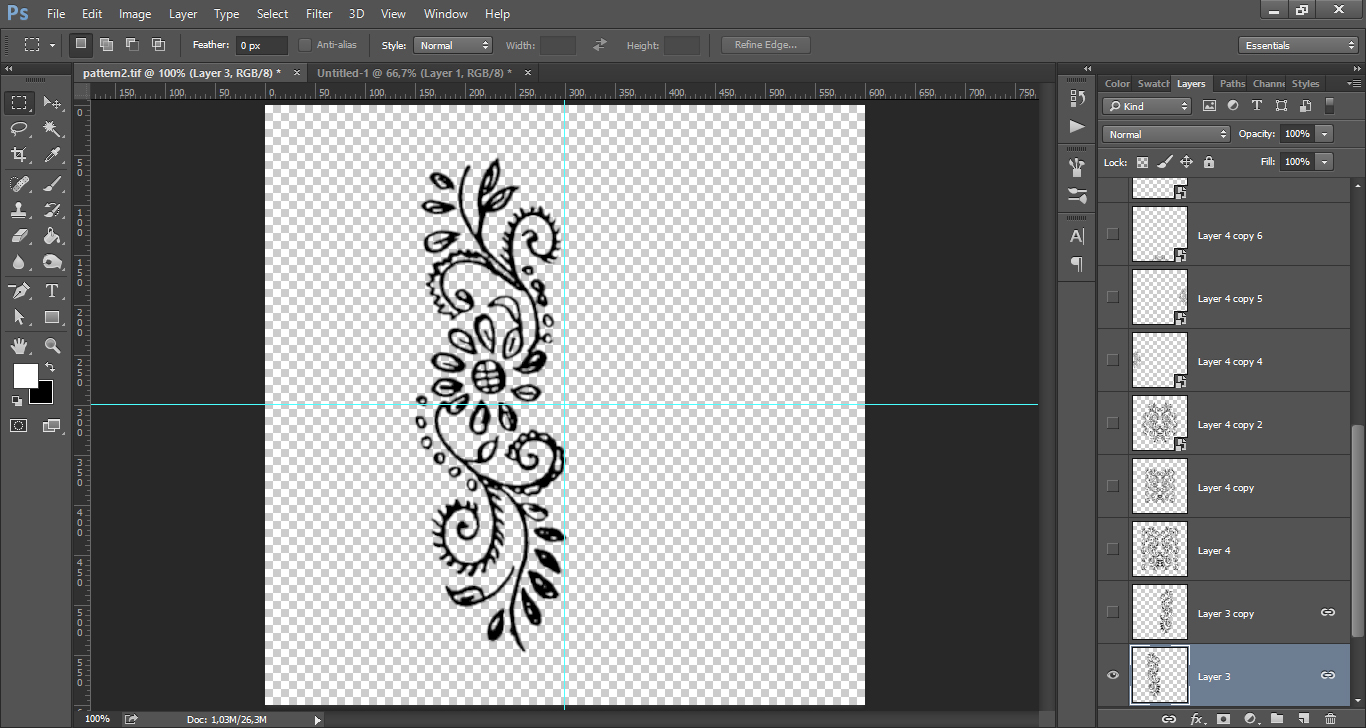
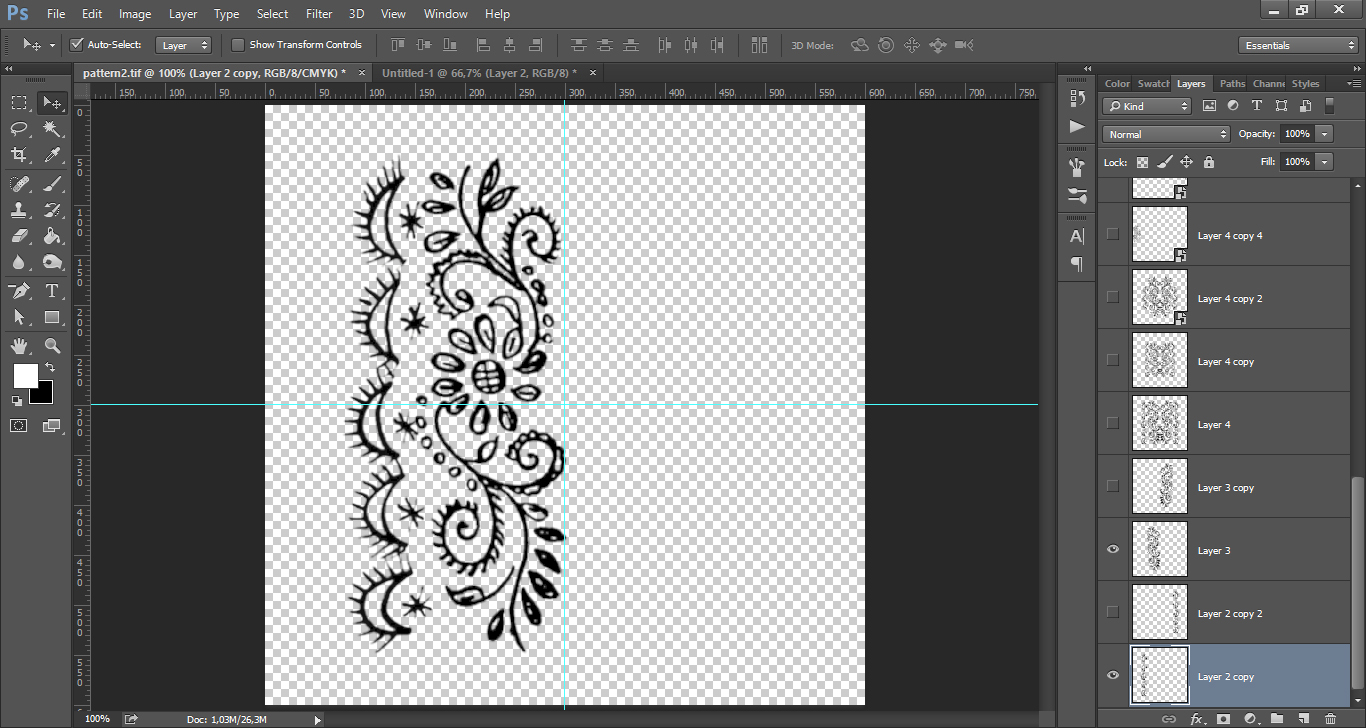
Add the first element:
If you select the element with the Move tool, you will notice that it will ‘stick’ to the guides if you try to move it. Put it on the left side of the vertical guide, and in the center of the horizontal guide. Then bring in the second element:
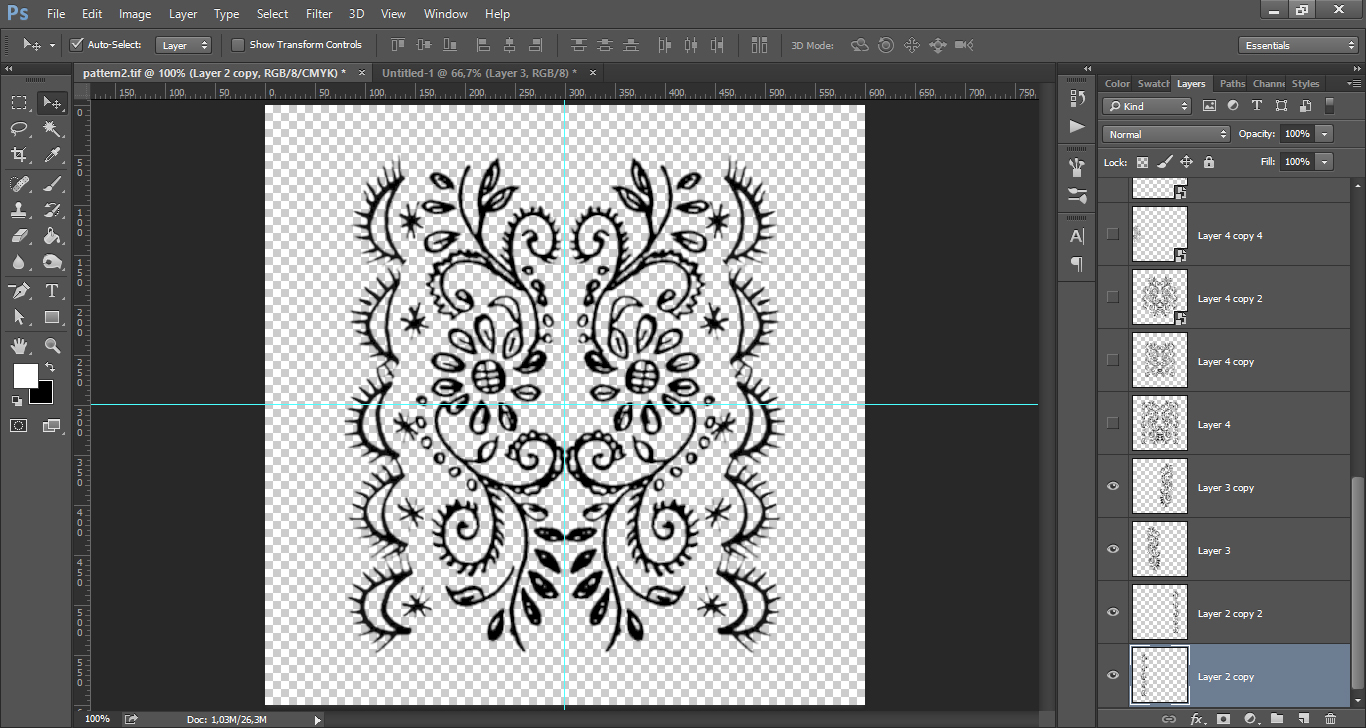
This element will also come on the left, and centered in the middle. Select both elements and copy them to the right by choosing Edit > Transform > Flip Horizontal. Here is what we have so far:
This was my first version of the pattern tile, but the final result was not what I had in mind. Like many things, pattern making is all about trial and error. So we are going to change a few things.
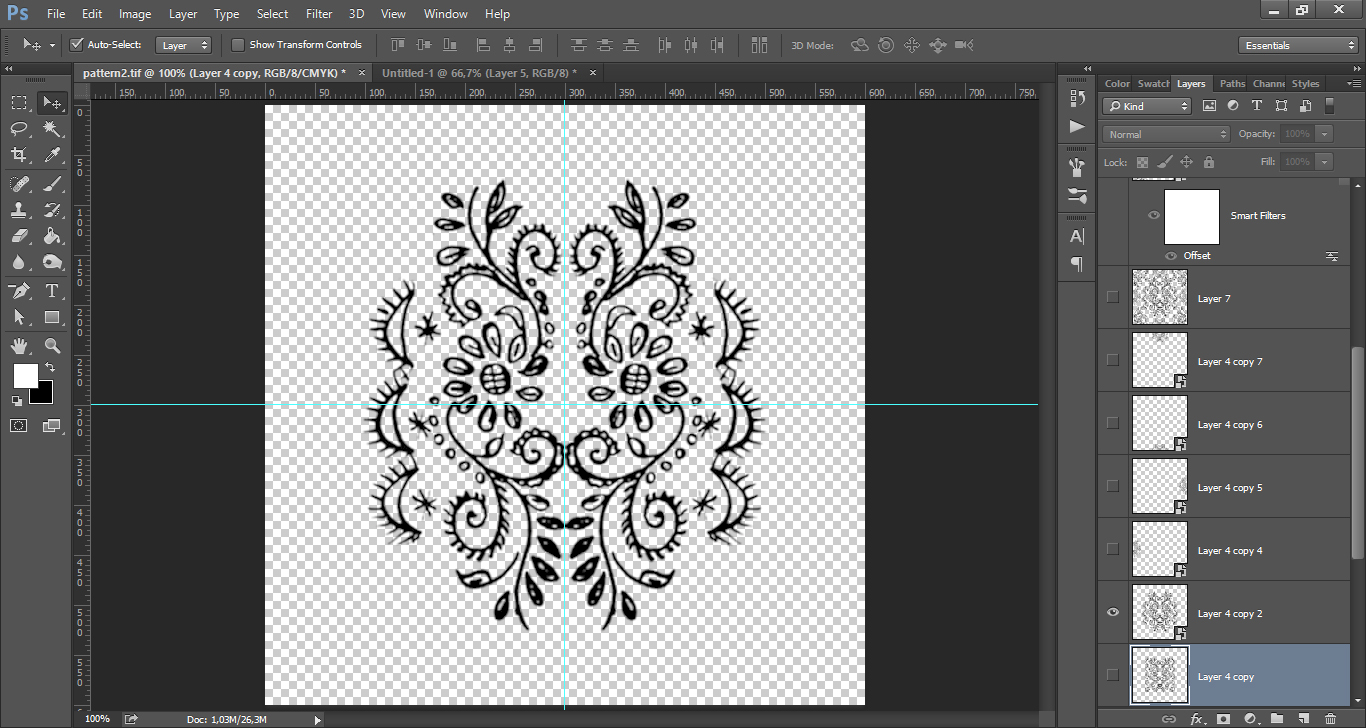
Keep the two elements in the center, but erase part of the outer elements. I erased the top and bottom half moon image so I had three half moons instead of five half moons. Then I scaled the half moons up a bit, not too much though. And the elements in the middle were scaled down a bit. This is what I came up with, looks much better already:
To make things easier you can make a merged copy of the elements. Making a merged copy is very easy: simply press the Alt key, and while pressing it, go to Layer > Merge Visible (that’s for Windows). You will now have an image with the four elements united as one, and you will still be able to access the separate elements in the layers below if you would need to change something afterwards.
Here is where the fun comes in!
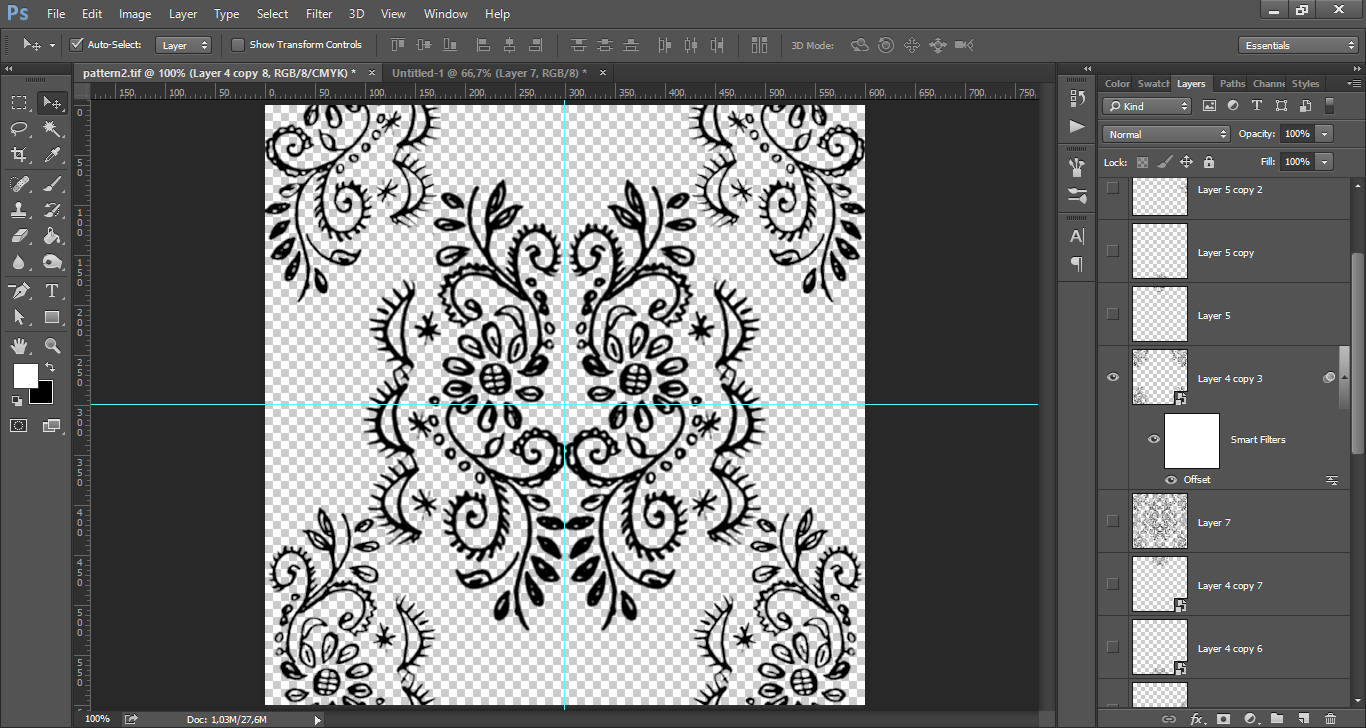
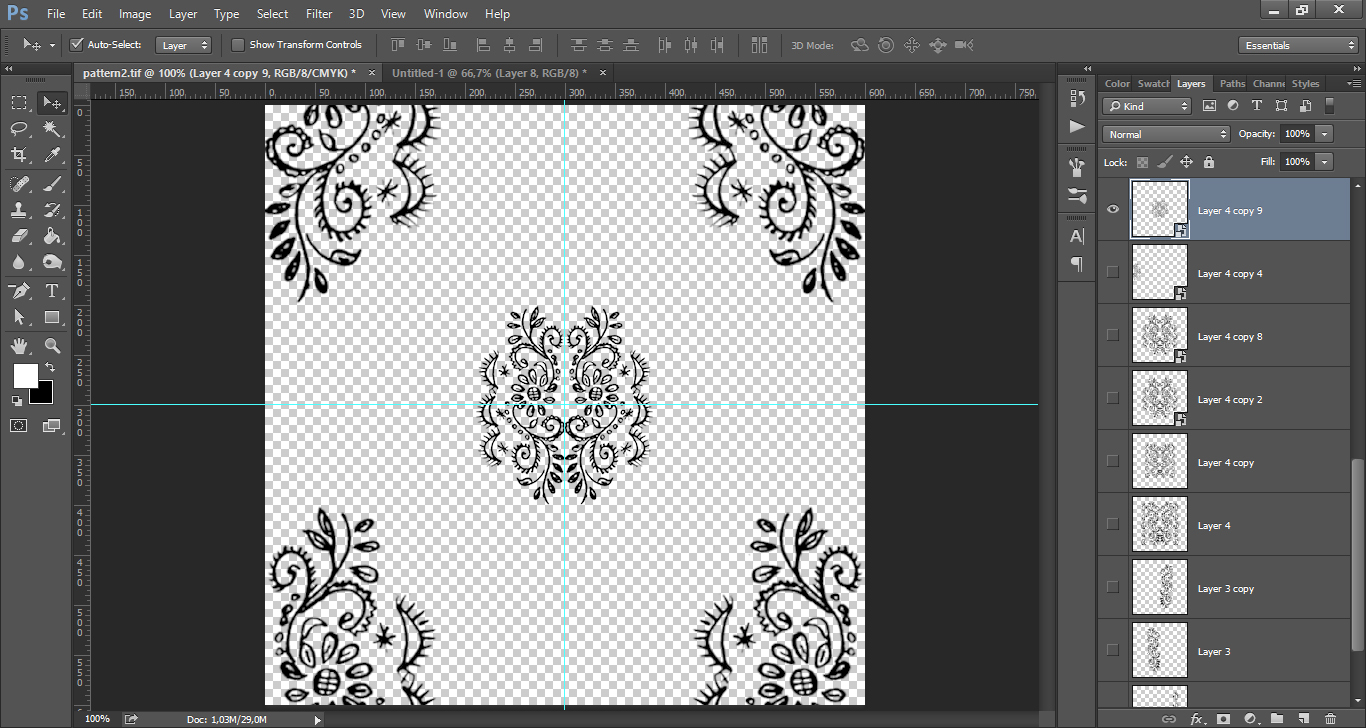
Make a copy of the merged image, because the Offset filter will leave an empty space at the selection’s original location. Then choose Filter > Other > Offset and the Offset dialog box will open up. This is why choosing easy dimensions was so important: enter half the width of the document into the Horizontal value box and half the height of the document into the Vertical value box. Since our document is 600 x 600 px, set both the Horizontal and Vertical options to 300 px. Make sure the Wrap Around option is selected at the bottom of the dialog box. And there you have it:
Looks great already, but I thought that the space between the elements was too empty. So I made another copy of the original merged copy and scaled it down to about 50%, it had to fit in the empty spaces. We can use the Offset filter again, but with other values than before. For better viewing, make the layer with the original image in the middle invisible:
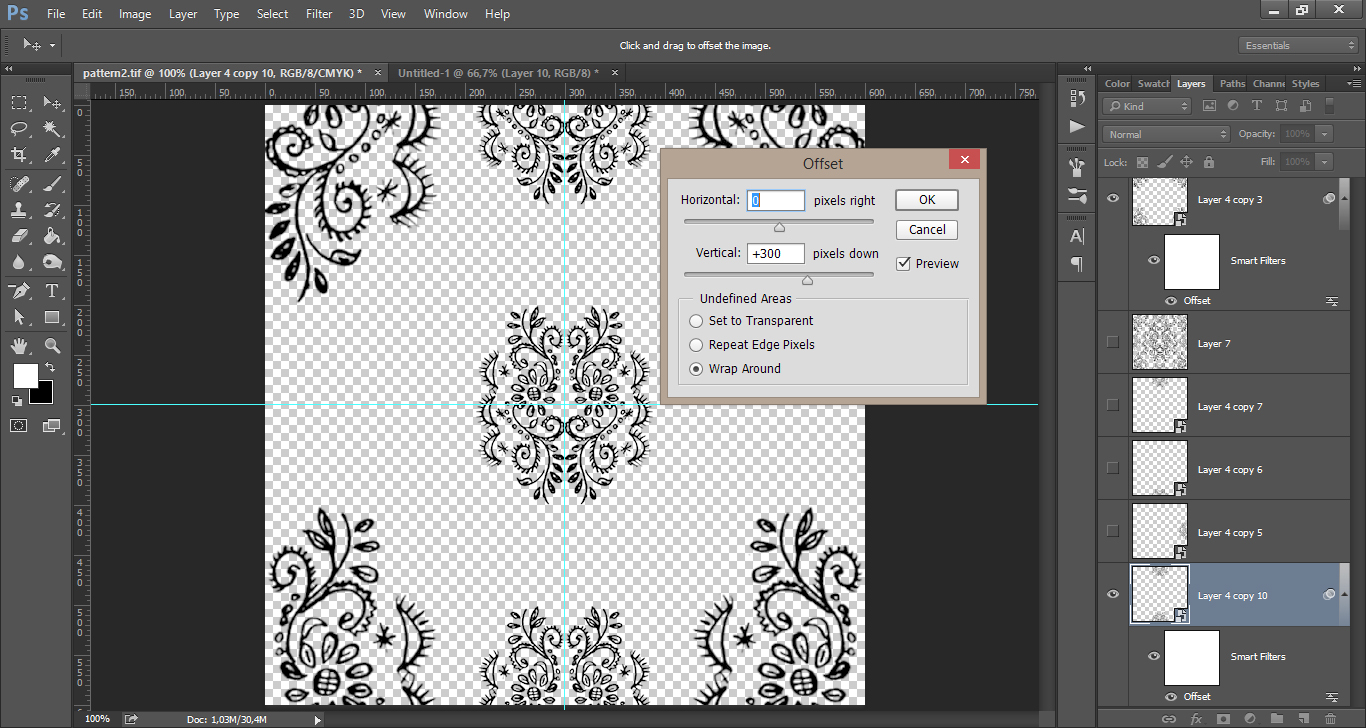
Make a copy of the tile and choose Filter > Other > Offset to open up the Offset filter dialog box. We will now have to make some calculations. If you fill in the same values as before, the tile will go in the corners again. That is not what we want. We will need to make this pattern in two steps. First we will determine the horizontal position, then we will determine the vertical position. By adding ‘0’ pixels for the horizontal position, and ‘300’ pixels for the vertical position, the tile will be moved to the top and bottom in the middle of the document.
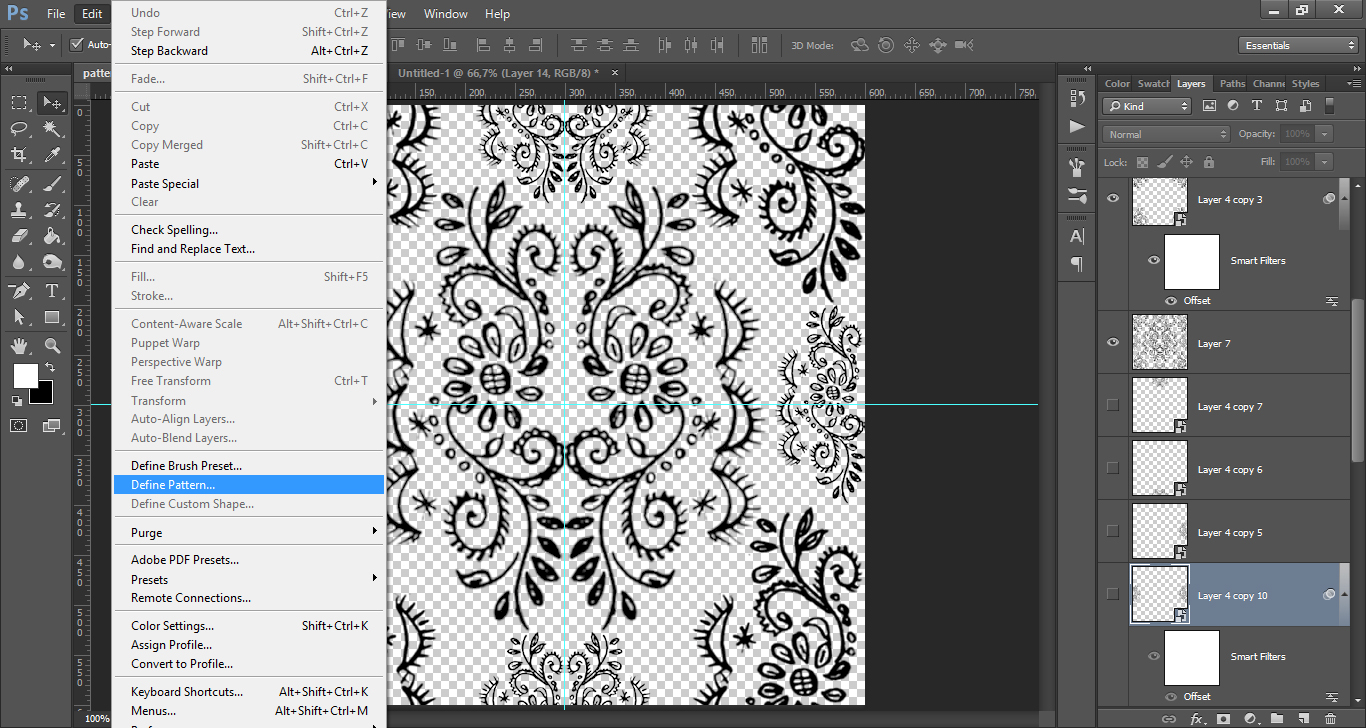
Make a new copy of the original tile, then go back to Filter > Other > Offset, and change the settings. Fill in ‘300’ pixels for the horizontal position and ‘0’ pixels for the vertical position. The tile will be placed on the left and the right side of your document. Make the original tile in the center invisible, we do not need it anymore. Turn the layer with the larger version of the tile back on and we finally have the whole pattern. This is what it looks like, pretty cool, isn’t it?
Choose Edit > Define Pattern. Your tile has now been saved as a Photoshop pattern and you can use it over and over again.
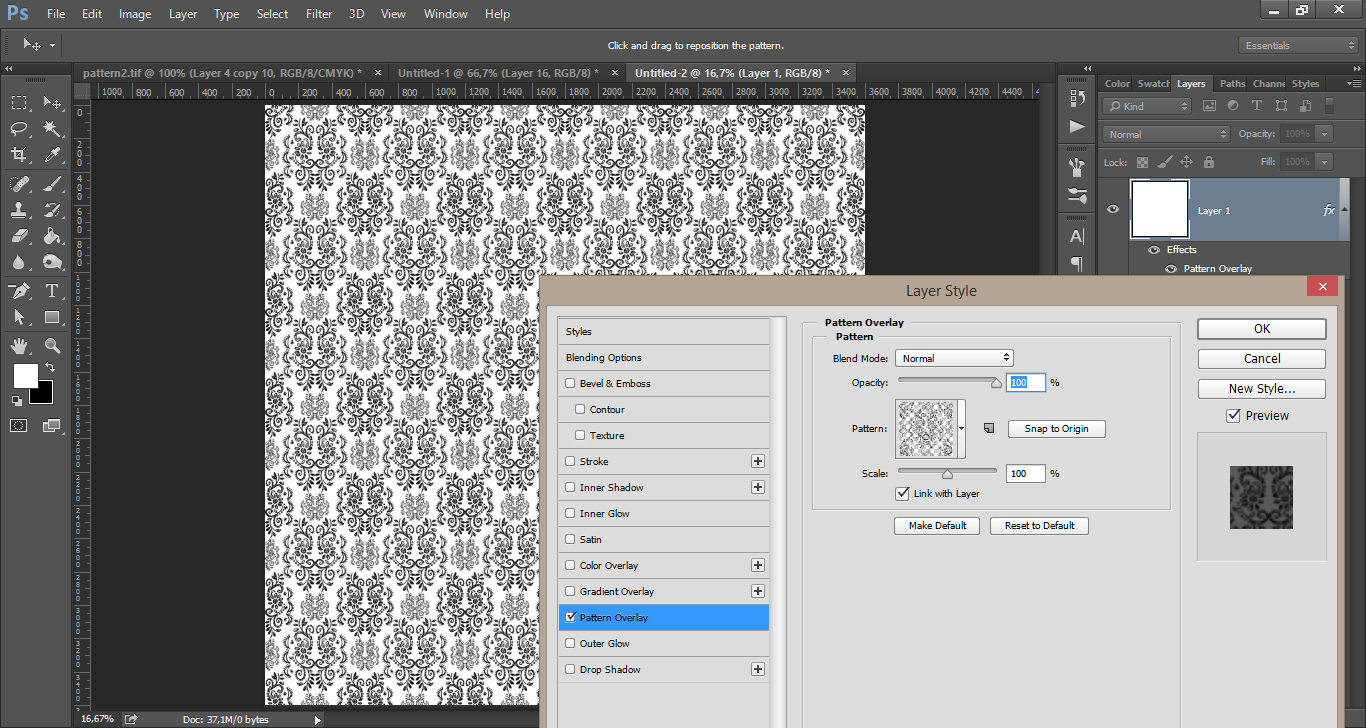
The easiest way to use patterns is to choose the layer style ‘Pattern overlay’. Open up a new document – let’s say 3600 x 3600 px – and fill it with white or any other colour you like. You can always change it later.
Double click on Layer 1, that will open up the Layer Style dialog box and select ‘Pattern Overlay’. Then from the dropdown box, select your pattern. The reason why it is better to choose ‘Pattern Overlay’, is that you can scale your pattern very easily. Simply drag the scaler down if you want it smaller. I kept my pattern at 100%. Click OK when you’re satisfied with how it looks.
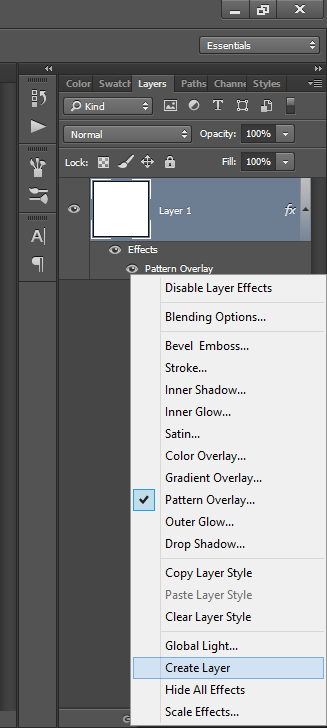
To have full control over your pattern, you need to make it into a separate layer. Right-click on the Layers effect, then choose ‘Create layer’ from the dropdown menu. This will turn your pattern overlay into a clipping mask.
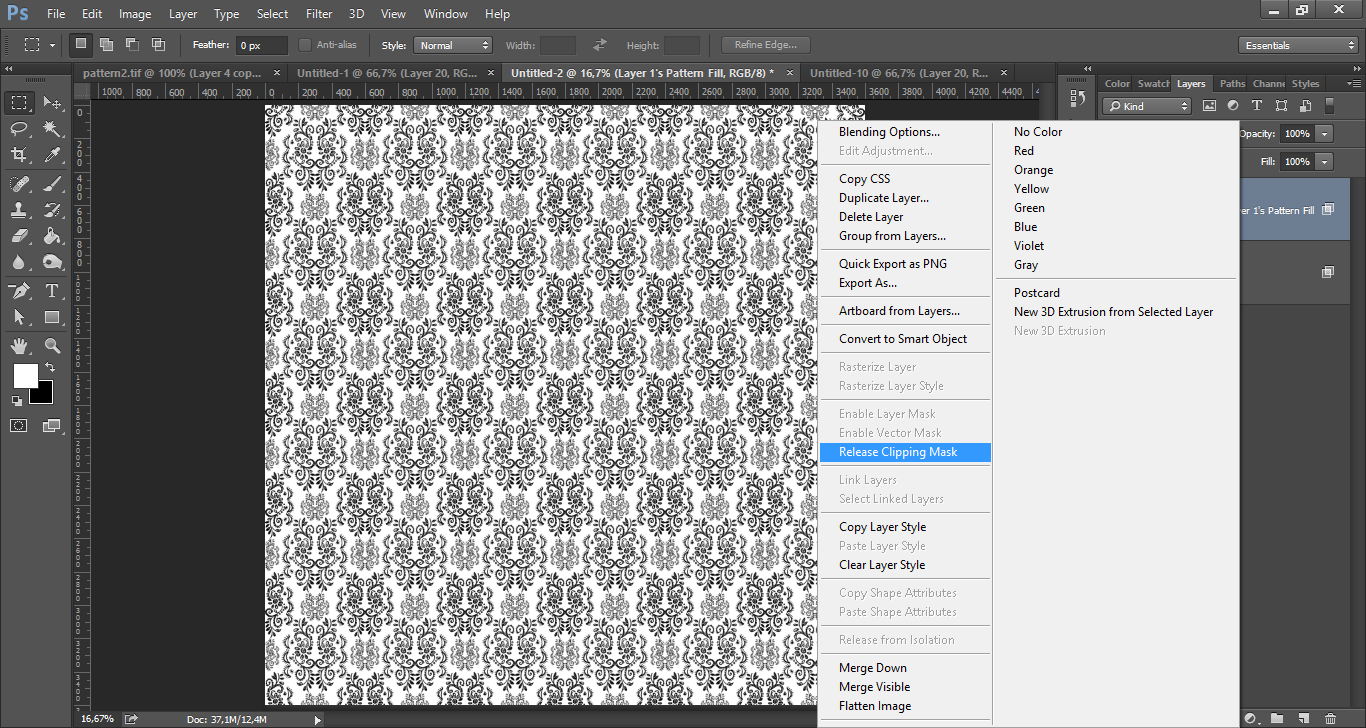
Two more steps to take: you need to release the clipping mask and convert the layer into a Smart Object. Right-click on the pattern layer and choose ‘Release clipping mask’.
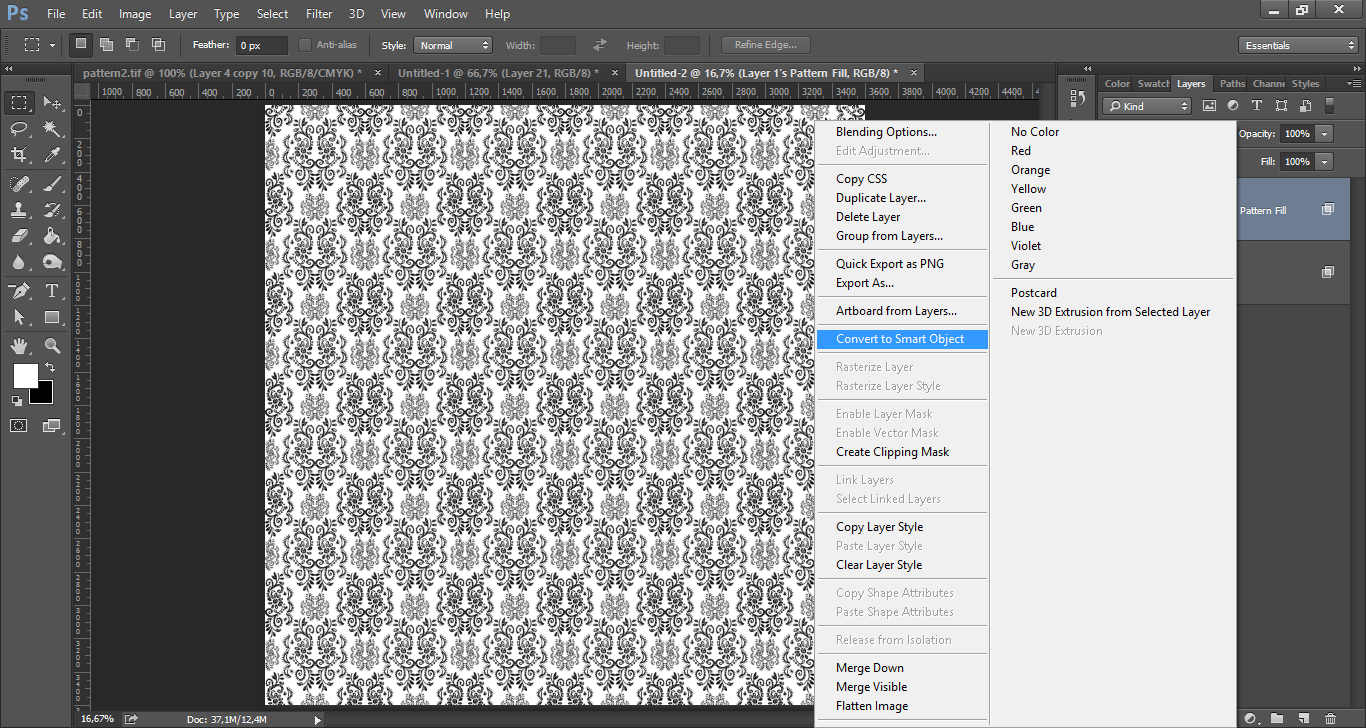
Next, right-click on the layer again and choose ‘Convert to Smart Object’:
And we’re there, the pattern is now fully editable. Add colour, layer styles, experiment. Have fun!






-6 Comments-
Thank You so much for such an amazing tutorial, Anja. I really appreciate it and it helped me a lot!
Love,
Tatiana ♥
I’m glad you like it Tatiana! I’d love to do more tutorials, but finding time for that is a bit of an issue right now…
I can imagine. Such things take lots of time, especially if they’re done so well as you did yours 😉
Tx
I’m glad I was able to help! Yes, that’s right, about the pattern fill… you cannot resize! That is why I prefer using the overlay method 🙂
Thanks for the tutorial. I thought I knew pattern making in Photoshop pretty well, but I never use the pattern overlay feature. I instead use the Fill with pattern, which has a lot more options (including the new Photoshop pattern scripts) this method however does have that very convenient preview for the scaling. I always have to do a lot of fiddling with my pattern preset to get the right size when I use the pattern fill. This is a great addition to my skill set! (It just occurred to me that you may have to beware of scaling up too much to avoid it getting blurry.)
[…] Source: Using the Offset filter in Photoshop to create patterns | Anja De Dobbelaere […]